 Load Balance is very important for bigger server. When huge user access any one server than one server resource is not enough for client need. I am just providing simple example to clear this. You have one server server1.linuxnix.com which server linuxnix.com. Your server can handle only 200 user at a time. 201th client see error or take long time to access till other client session stop.
So you can solve this problem with load balance. Just add a load balance server (low configure server or VPS is enough) like balance.linuxnix.com. Another server node server2.linuxnix.com.
When people visit linuxnix.com it will access balance.linuxnix.com and it will forward you on server1.linuxnix.com or server2.linuxnix.com randomly. If one of your servers being down active server will serve. You can add more server like
server3.linuxnix.com or server4.linuxnix.com …. …. … serverN.linuxnix.com
I think load balance idea is clear for you.
This is just one idea. There is different technology to establish load balance.
Advantage of load balance server:
- Traffic manage: At the time of huge traffic load balance server can be added and manage client
- Backup: This is good backup practice to use load balance server. This server providing life backup server. If one down another is serving.
- Decrease Downtime: If one link being down, another link will serve. This will make almost zero time.
- Cost effective: You can add server node when you need. So you don’t need to purchase high configuration server.
Setup pound on CentOS 6.x
Pound is high availability load balance server. It is open source software work like reverse proxy. Pound itself is not webserver, it just handle client request and contact back end server.
We will setup load balance server based on pound.
Here
The pound server is 192.168.0.11
Back End Server1: 192.168.0.9
Back End Server2: 119.148.38.140
|Client
--------+--------------------------------------------------------------------
        |
        +-------------------+-----------------------+
        |192.168.0.11       |192.168.0.9            |119.148.38.140
 +------+-----+     +-------+------+     +-------+------+
 |  Frontend  |     |   Backend#1  |     |   Backend#2  |
 |   Pound    |     |  Web Server  |     |  Web Server  |
 +------------+     +--------------+     +--------------+
Step-1: Install Pound
[root@yourdomain ~]# yum install Pound
Loaded plugins: fastestmirror, refresh-packagekit, security
Setting up Install Process
Loading mirror speeds from cached hostfile
* base: mirror.dhakacom.com
* epel: ftp.cuhk.edu.hk
* extras: mirror.dhakacom.com
* updates: mirror.dhakacom.com
Resolving Dependencies
–> Running transaction check
—> Package Pound.x86_64 0:2.6-2.el6.1 will be installed
–> Finished Dependency Resolution
Dependencies Resolved
================================================================================
Package Arch Version Repository Size
================================================================================
Installing:
Pound x86_64 2.6-2.el6.1 epel 99 k
Transaction Summary
================================================================================
Install 1 Package(s)
Total download size: 99 k
Installed size: 238 k
Is this ok [y/N]: y
Downloading Packages:
Pound-2.6-2.el6.1.x86_64.rpm | 99 kB 00:01
Running rpm_check_debug
Running Transaction Test
Transaction Test Succeeded
Running Transaction
Installing : Pound-2.6-2.el6.1.x86_64 1/1
Verifying : Pound-2.6-2.el6.1.x86_64 1/1
Installed:
Pound.x86_64 0:2.6-2.el6.1
Step-2:
Eid pound.cfg file
# vi /etc/pound.cfg
Service
BackEnd
Address 192.168.0.9
Port 80
Priority 5
End
BackEnd
Address 119.148.38.140
Port 80
Priority 5
End
End
We can add more server if we need. But here we are using two server.
Step-3:
Now start the service
# service pound start
# chkconfig pound on
You have to 192.168.0.9 and 119.148.38.140 http service should be enabled.
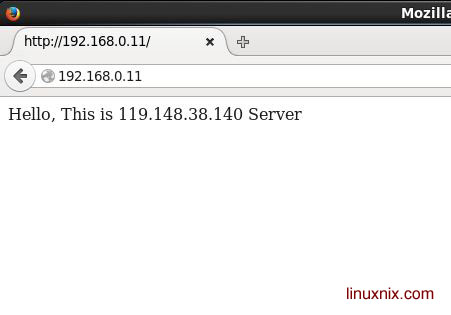
Now browse the load balancer IP 192.168.0.11
Randomly you will see the following page. I have added the different index.html file in the servers.

This is just a simple pound based load balance tutorial.